tenderflake pie crust baking instructions
Tenderflake Pie Crust Baking Instructions: A Comprehensive Guide
Embark on a delightful baking journey, mastering the art of Tenderflake pie crust! This guide unveils secrets to consistently achieve buttery, flaky perfection,
transforming your pies into show-stopping desserts for every occasion and celebration․
Understanding Tenderflake Crust
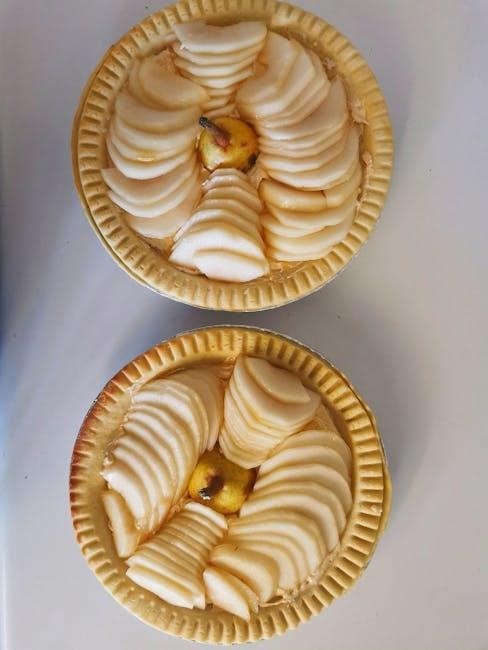
Tenderflake crust represents a cornerstone of classic baking, beloved for its remarkably flaky texture and rich, buttery flavor․ Achieving this quality isn’t accidental; it stems from a specific formulation and technique․ Many bakers, both amateur and expert, find pie-making rewarding, yet potentially daunting, especially when starting from scratch․
The key lies in understanding that a truly exceptional pie crust isn’t merely a vessel for filling, but a crucial component of the overall dessert experience․ It’s a testament to patience and precision, demanding attention to detail from ingredient selection to baking temperature․ Successfully creating a Tenderflake crust elevates a simple fruit filling or custard into something truly special, perfect for holiday gatherings or everyday enjoyment․ Mastering this skill unlocks a world of baking possibilities, allowing you to confidently tackle any pie recipe․
What is Tenderflake?
Tenderflake isn’t simply a brand name; it refers to a specific type of shortening traditionally used in pie crusts to achieve exceptional flakiness․ Unlike butter alone, Tenderflake – and similar vegetable shortenings – contains a higher fat content and lower water content․ This crucial difference inhibits gluten development, resulting in a more tender and crumbly crust․
Historically, bakers relied on lard for this effect, but Tenderflake offered a more convenient and neutral-flavored alternative․ While butter contributes flavor, shortening excels at creating those desirable flaky layers․ Many modern recipes combine both butter and shortening, leveraging the strengths of each․ The “easy as pie” saying belies the technique involved, but understanding Tenderflake’s role is a significant step towards consistently producing a perfect, golden-brown crust that’s a joy to both make and eat․
Key Ingredients & Their Roles
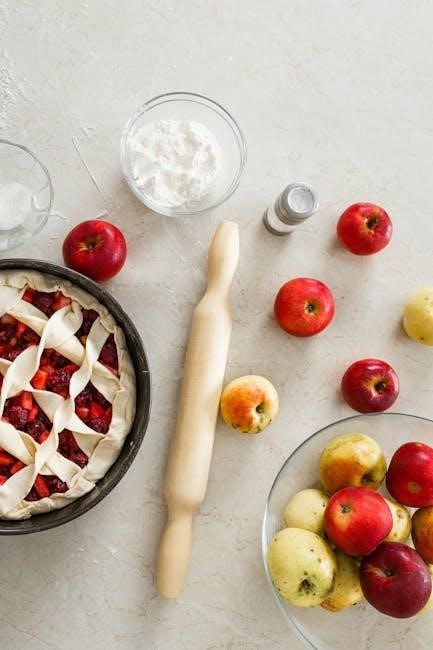
A successful Tenderflake pie crust relies on a harmonious blend of ingredients, each playing a vital role․ All-purpose flour provides structure, but its gluten development must be controlled․ Tenderflake shortening, or a similar vegetable shortening, delivers flakiness by creating pockets of fat that separate the flour layers․
Cold butter, often used in conjunction with shortening, contributes flavor and richness․ Ice water is essential – it hydrates the flour without activating too much gluten․ A pinch of salt enhances the flavors, while a touch of sugar can aid in browning and add subtle sweetness․ Mastering the proportions and understanding how each ingredient interacts is key․ Remember, the goal is a tender, flaky crust, not a tough, chewy one, so ingredient quality and precise measurement matter greatly․
The Importance of Cold Ingredients
Maintaining consistently cold ingredients is absolutely paramount when crafting a Tenderflake pie crust․ Warm ingredients melt the shortening and butter, resulting in a dough that’s sticky and difficult to work with, ultimately leading to a tough, rather than flaky, crust․ The solid fat creates those crucial layers that separate during baking, yielding the desired texture․
Chill the flour, shortening, and butter before beginning․ Use ice water – even adding a few ice cubes directly to the water is beneficial․ Work quickly to prevent the dough from warming up during the cutting-in process․ If the dough becomes too soft, return it to the refrigerator for a brief chilling period․ This dedication to coldness is the secret to achieving a light, airy, and wonderfully flaky pie crust every time․
Preparing the Tenderflake Pie Crust
Now, let’s begin the exciting process of creating your Tenderflake pie crust! Accurate measurements and proper technique are key to success, ensuring a delightful baking experience․
Measuring Ingredients Accurately
Precision is paramount when crafting a Tenderflake pie crust; baking is a science, after all! For flour, avoid scooping directly from the bag, as this compacts it, leading to too much flour in your dough․ Instead, gently spoon the flour into your measuring cup and level it off with a straight edge․ This ensures a lighter, more tender crust․
When measuring shortening or butter (especially Tenderflake!), use the ‘cold cube’ method․ Cut the fat into uniform cubes and measure precisely․ Don’t rely on volume alone; a kitchen scale provides the most accurate results․ Liquid measurements, like ice water, should be exact․ Use a liquid measuring cup and check at eye level to ensure accuracy․
Remember, even slight variations can impact the final texture․ A little extra flour can result in a tough crust, while too much water can make it sticky and difficult to roll․ Consistent, accurate measurements are the foundation of a perfect Tenderflake pie crust, setting you up for baking success!
Cutting in the Tenderflake
The key to a flaky Tenderflake crust lies in “cutting in” the shortening․ This process creates small, flat pieces of fat coated in flour, which melt during baking, creating layers․ Use a pastry blender, two knives, or even your fingertips (working quickly to keep everything cold!)․ The goal isn’t to completely blend the fat, but to achieve a coarse, pea-sized texture․
Don’t overwork it! You should still see visible pieces of Tenderflake․ These pockets of fat are crucial for flakiness․ If using your fingers, work swiftly to prevent the fat from warming up․ Some bakers prefer pulsing the ingredients in a food processor, but be extremely careful not to over-process․
Properly cut-in Tenderflake ensures a tender, flaky crust, rather than a tough, dense one․ This step is where the magic happens, building the structure for a truly exceptional pie․ Embrace the slightly messy process – it’s worth it!
Adding Ice Water – The Right Amount
Gradually add ice water, one tablespoon at a time, to the flour and Tenderflake mixture․ The water’s temperature is vital – it must be ice cold to prevent the fat from melting prematurely․ Mix lightly after each addition, just until the dough begins to come together․ Resist the urge to add too much water at once; it’s easier to add more than to correct an overly wet dough․
The amount of water needed will vary depending on humidity and flour type․ You’re aiming for a dough that is just moistened enough to hold its shape when gently squeezed․ It shouldn’t be sticky or overly dry․ A shaggy, slightly crumbly texture is ideal at this stage․
Adding water carefully ensures a tender crust․ Overworking the dough with excess water develops gluten, leading to a tough result․ Patience and a light touch are key to success!
Bringing the Dough Together
Once the ice water is incorporated, gently gather the dough into a ball․ Avoid kneading! The goal isn’t to create a smooth, elastic dough, but rather to bring it together just enough so it forms a cohesive mass․ Overworking develops gluten, resulting in a tough, rather than flaky, crust․
If the dough seems too dry and isn’t coming together, add another teaspoon of ice water, mixing lightly․ Conversely, if it’s too sticky, dust the work surface with a little flour․ Handle the dough as little as possible throughout this process․
Divide the dough in half for a double-crust pie, or leave it as one piece for a single crust․ Flatten each portion into a disc about an inch thick․ This makes rolling easier later on, and prepares it for chilling․
Chilling and Rolling the Crust
Proper chilling solidifies the fat, preventing shrinkage during baking, and relaxes the gluten․ Rolling requires a light touch, ensuring a tender, flaky texture for your pie․
Why Chilling is Crucial
Chilling the Tenderflake pie crust dough is arguably the most important step after initial mixing, impacting the final texture dramatically․ Allowing the dough to rest in the refrigerator for at least 30 minutes, and preferably longer – even overnight – accomplishes several key objectives․ Firstly, it allows the gluten, developed during the mixing process, to relax․ This prevents the crust from becoming tough and elastic, ensuring a tender bite․
Secondly, and crucially, chilling solidifies the Tenderflake shortening․ Solid fat creates layers within the dough; as it melts during baking, these layers separate, resulting in the desirable flaky texture we associate with a perfect pie crust․ Without sufficient chilling, the fat will be too soft, blending into the flour instead of creating distinct layers․ Finally, a chilled dough is much easier to handle and roll out neatly, minimizing sticking and tearing, and contributing to a more professional-looking finished product․
Rolling Out the Dough – Techniques
Successfully rolling out Tenderflake pie crust requires a cool surface, a lightly floured rolling pin, and gentle pressure․ Begin by lightly flouring your work surface – marble or a clean countertop work best․ Place the chilled dough in the center and gently press down with the rolling pin to initiate the rolling process․ Roll from the center outwards, rotating the dough a quarter turn after each roll to maintain a circular shape and prevent sticking․
Avoid pressing down too hard, as this can overwork the gluten and result in a tough crust․ If the dough becomes sticky, lift it carefully and add a dusting of flour underneath․ Aim for a circle approximately 12 inches in diameter for a standard 9-inch pie plate, ensuring it’s slightly larger to allow for crimping․ For easier transfer, gently roll the dough around the rolling pin․
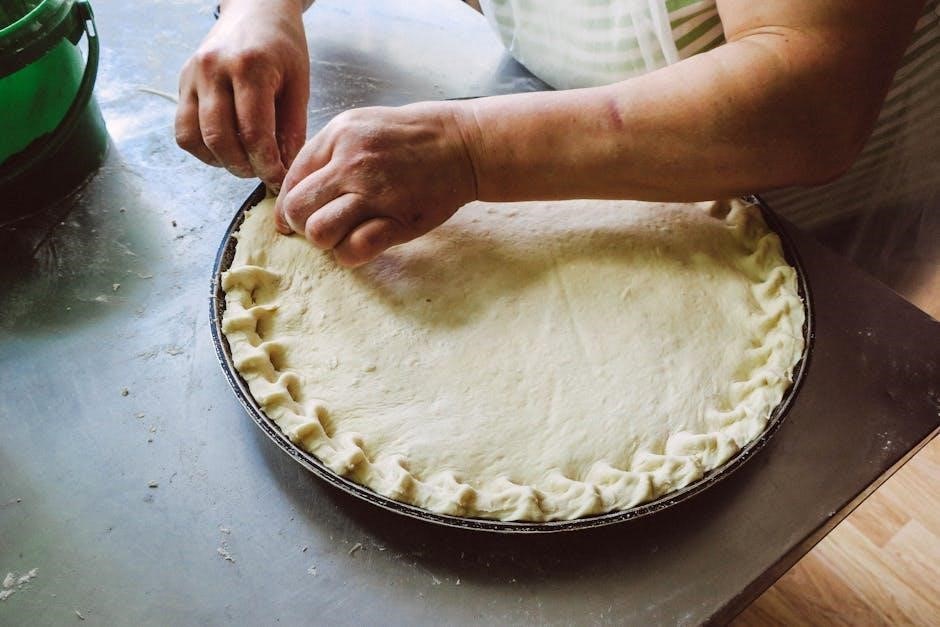
Transferring to the Pie Plate
Carefully transferring the rolled Tenderflake dough to the pie plate is a crucial step․ If you’ve rolled the dough around the rolling pin, gently lift and unroll it over the pie plate, centering it as much as possible․ Alternatively, you can carefully fold the dough in half or quarters and then unfold it into the plate․
Once in the plate, gently ease the dough into the corners and against the sides, avoiding stretching․ Stretching can cause the crust to shrink during baking․ If any tears occur, lightly moisten your fingers with water and gently patch them․ Excess dough hanging over the edge can be trimmed, leaving about an inch for crimping․ A clean, precise transfer sets the stage for a beautifully presented pie․
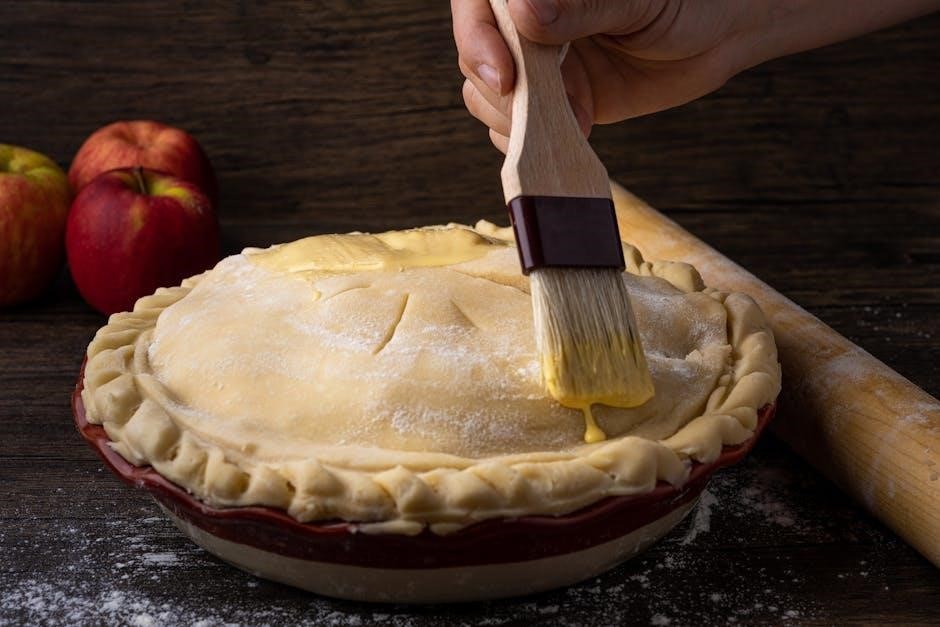
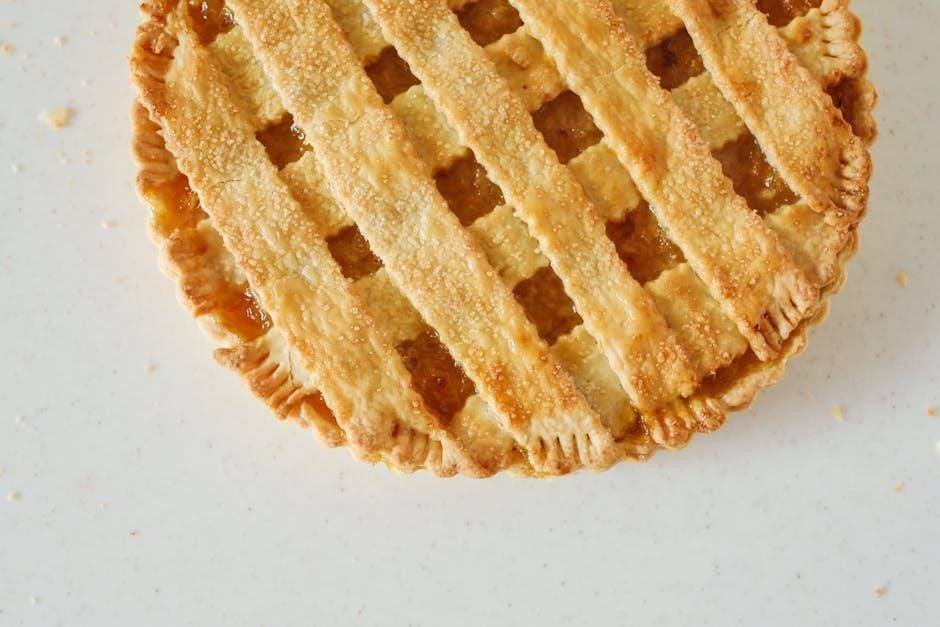
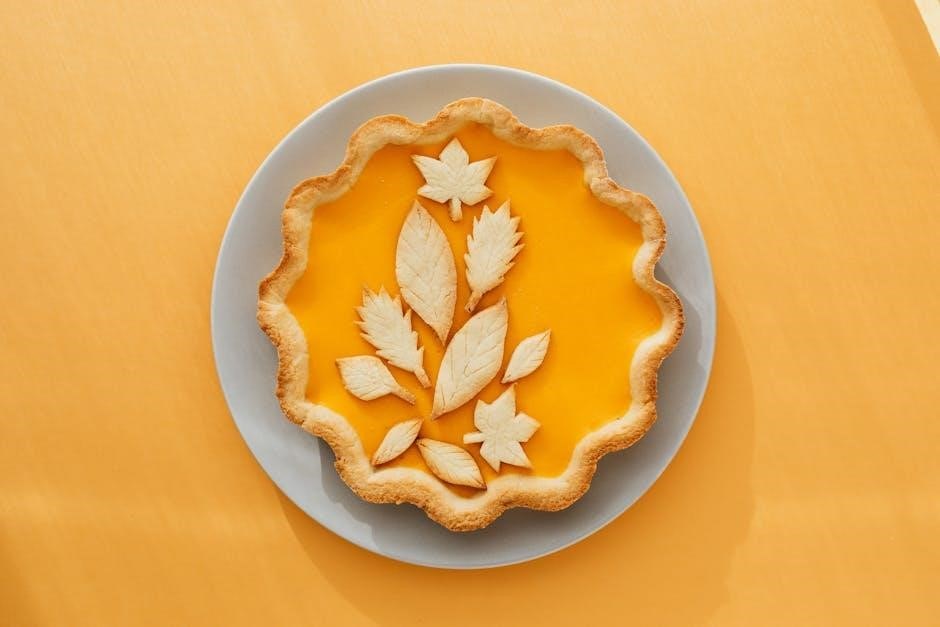
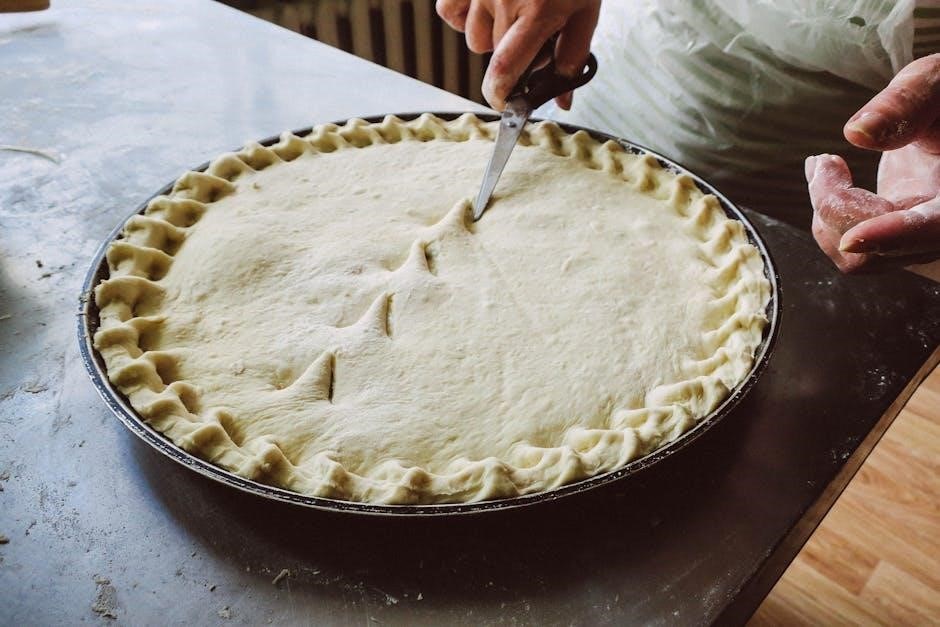
Crimping and Fluting the Edges
Elevate your pie’s presentation with beautifully crimped or fluted edges! After trimming, gently fold the overhanging dough under itself to create a thicker edge․ Then, use your fingers to create a decorative pattern․ A classic crimp involves pinching the dough between your thumb and forefinger, while fluting uses the tines of a fork to press a pattern around the rim․
For a more elaborate look, experiment with different crimping techniques․ Ensure a secure seal to prevent filling from bubbling over during baking․ A well-defined edge not only enhances the pie’s appearance but also provides a comfortable grip for serving․ This final touch transforms a simple pie into a visually appealing masterpiece, ready to impress!
Baking the Tenderflake Pie Crust
Now, transform your crafted crust into golden perfection! Mastering baking temperatures and times is key, ensuring a flaky, structurally sound base for your delicious fillings․
Blind Baking – When and How
Blind baking, pre-baking the crust before adding the filling, is essential for pies with liquid fillings like custard or cream․ Without it, a soggy bottom is almost guaranteed! To begin, prick the bottom of the rolled-out Tenderflake crust several times with a fork – this prevents puffing․
Next, line the crust with parchment paper and fill it with pie weights (dried beans or rice work well too!)․ This anchors the crust, maintaining its shape during baking․ Bake at around 375°F (190°C) for 15-20 minutes, then carefully remove the weights and parchment․
Return the crust to the oven for another 5-10 minutes, until it’s lightly golden brown․ Watch closely to prevent burning! For fillings that require less baking, a partially blind-baked crust is sufficient․ This technique ensures a crisp, stable foundation, elevating your pie to professional standards․
Preventing a Soggy Bottom Crust
A soggy bottom is a pie baker’s nemesis, but thankfully, preventable! Several techniques contribute to a crisp, firm base․ Firstly, ensure your Tenderflake crust is thoroughly chilled before filling․ Cold fat creates flaky layers that resist moisture absorption․ Secondly, brush the bottom crust with a lightly beaten egg white before adding the filling; this creates a waterproof barrier․
Consider pre-baking (blind baking) the crust, especially for very wet fillings․ Baking the crust first sets it, minimizing sogginess․ Also, avoid overfilling the pie; excess liquid seeps into the crust․ Finally, bake the pie on the lowest rack of the oven – this directs heat towards the bottom, promoting crisping․
These simple steps guarantee a delightful, structurally sound pie, free from the dreaded soggy bottom!
Baking Temperature and Time
Generally, Tenderflake pie crusts benefit from a higher initial baking temperature, followed by a reduction․ Begin baking at 425°F (220°C) for the first 15-20 minutes․ This initial heat creates steam, encouraging a flaky crust and setting the structure․ Subsequently, reduce the oven temperature to 350°F (175°C) to finish baking․
Total baking time varies depending on the filling and whether the crust is blind-baked․ A filled pie typically requires 45-60 minutes, while a blind-baked crust needs 20-25 minutes․ Always check for doneness – the crust should be golden brown and the filling bubbling․
Remember, oven temperatures can vary, so monitoring is key to achieving a perfectly baked, golden-brown Tenderflake pie crust!
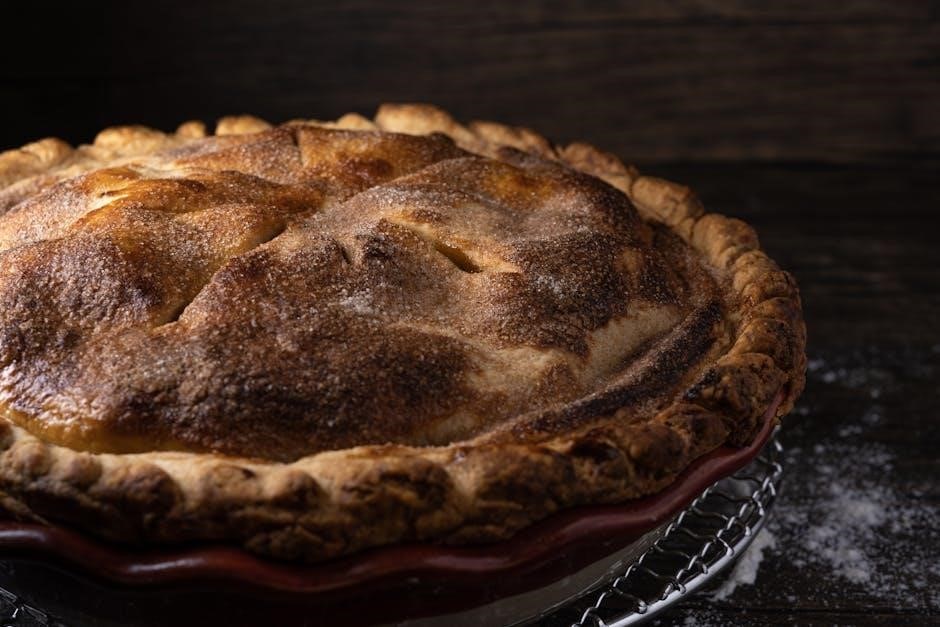
Signs of a Perfectly Baked Crust
A truly exceptional Tenderflake pie crust exhibits several key characteristics․ Visually, the crust should boast a rich, golden-brown hue, evenly distributed across the surface․ Avoid pale or overly dark areas, indicating uneven baking․ Gently press the crust; it should feel firm to the touch, offering a slight resistance without being rock-hard․
Listen closely – a subtle, crisp sound when tapped indicates proper baking․ The edges should be beautifully defined and slightly puffed, showcasing the flaky layers․ If baking a filled pie, observe the filling; it should be bubbling and thickened, signaling the crust is adequately set․
Ultimately, a perfect crust is both visually appealing and structurally sound, ready to cradle your delicious filling!
Troubleshooting Common Issues
Don’t despair if your Tenderflake crust isn’t perfect! Common problems like toughness, shrinking, burning, or sogginess have solutions, ensuring baking success and delightful pies․
Crust is Too Tough
A tough pie crust often stems from overworking the dough, developing too much gluten․ Remember, tenderness is key! Avoid excessive mixing after adding the water; aim for just combined․ The goal is to keep those little bits of Tenderflake intact, creating flaky layers, not a cohesive, elastic mass․
Insufficient fat is another culprit․ Ensure you’re using the correct amount of Tenderflake and that it remains cold throughout the process․ Cold fat creates steam when baking, resulting in flakiness․ Warm or melted fat will blend into the flour, leading to a denser, tougher crust․
Finally, consider your flour․ Too much protein can contribute to gluten development․ Using a pastry flour, or a blend of all-purpose and pastry flour, can help․ Gentle handling and cold ingredients are your allies in achieving a tender, melt-in-your-mouth crust!
Crust is Shrinking
Pie crust shrinkage is a common frustration, often caused by gluten development or insufficient support during baking․ Overworking the dough, as with a tough crust, encourages gluten formation, causing the crust to contract as it bakes․ Handle the dough gently and avoid excessive kneading or rolling․
Another key factor is stretching the dough when transferring it to the pie plate․ Gently ease it into the plate rather than pulling and stretching it to fit․ This prevents the gluten strands from tightening and causing shrinkage․ Allow the dough to relax for a few minutes before crimping․
Finally, chilling the dough thoroughly before baking is crucial․ Cold dough holds its shape better․ Blind baking with pie weights provides essential support, preventing the sides from slumping down․ A properly chilled and supported crust will maintain its beautiful form!
Crust is Burning
A burnt pie crust is a disheartening sight, but often preventable with careful temperature control and shielding techniques․ Typically, burning occurs when the crust is exposed to direct heat for too long, especially around the edges․ Lowering the oven temperature slightly can help, particularly if your oven runs hot․
To protect the crust edges, consider using a pie shield or creating one from aluminum foil․ This deflects heat and prevents excessive browning or burning․ Check the pie frequently during the final stages of baking, and rotate it if necessary for even cooking․
Remember that darker crusts bake faster․ If your recipe calls for a golden-brown crust, watch closely to avoid crossing the line into burnt territory․ A slightly underbaked crust is preferable to a completely charred one – you can always continue baking for a few more minutes!
Crust is Soggy
A soggy bottom crust is a common pie-baking woe, often stemming from excess moisture in the filling or insufficient baking․ To combat this, pre-baking, or “blind baking,” the crust is crucial, especially for fillings with high moisture content like fruit pies․ Ensure the crust is thoroughly chilled before baking; cold fat creates flakiness and resists moisture absorption․
Brushing the pre-baked crust with a thin layer of melted chocolate or egg wash creates a barrier against the filling’s moisture․ Another trick is to sprinkle a thin layer of breadcrumbs or finely ground nuts onto the crust before adding the filling – these absorb excess liquid․
Finally, ensure the pie is baked long enough at the correct temperature․ A fully baked crust will be golden brown and firm to the touch, minimizing sogginess and providing a delightful textural contrast to the filling․
Leave a Reply
You must be logged in to post a comment.